
 Aprilaire 2200 Air Cleaner Repair Help
Be sure to turn the power off before performing any maintenance.
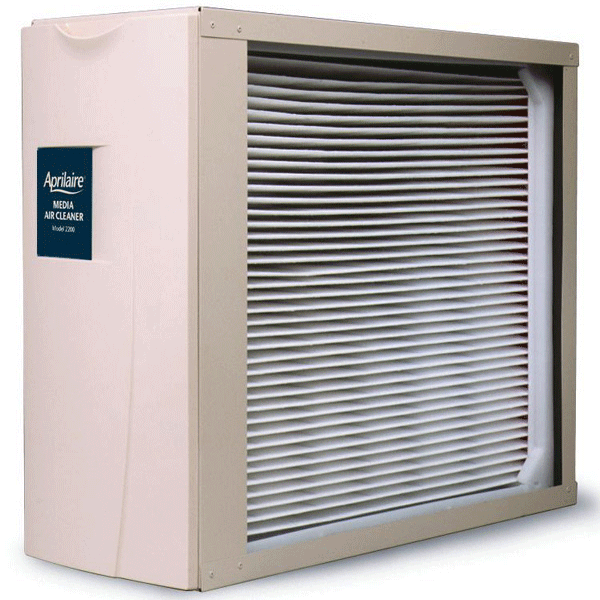
This is the model 2200 Aprilaire air cleaner. There's a 2400 air cleaner that's slightly different size, it's a little shorter and a little deeper. But, as far as putting the filter in, that parts the same. The other part's are different, but installation is the same.
Now, this particular door on this one is a generation 3. This is the newest style of the 2200 air cleaner, so it has a generation 3 door, it's held on by four little clips here. There's a generation 2 door. It looks like this, no clips on the back. It would go on like this on a generation 2 air cleaner. There would be big tabs at the top that would lift up, and also at the bottom. There's a generation 1 door. That is all steel. And it has two knobs, little nuts that come off. So, three different generations, they all use the same filter.
So, let's slide out this filter cabinet. Alright, now there are four little buttons you have to push in. One there, and there, there, and there. We'll hinge these down.
Now, we're going to take out the pleat spacers. These, you just gently tweet them a little bit, and pull. Ok. Now, sometimes the tabs break off of these. This little end here will break. If you find one of them broken, you're going to want to replace these. Only the ones that are broken, you don't need to replace all of them if only one of them is broken, just replace the one. If you find broken tabs, what ends up causing this usually, is the filter has gotten too dirty, you've waited too long to replace the filter, it is very important that you replace the filter every 6 months for most people, every 12 months for people that only have heating. If you have a dirty situation in your house with lot's of hairy pets running around, you may need to replace the filters more often. But again, if you find you have broken tabs, 99 times out of 100, that is caused by the filter has become too dirty. And it's a cascade effect, so if one tab breaks, quite often what happens is the next tab breaks, then the next one, and the next one, next one and eventually you get in here and you have five of them broken, and you'll end up deleting all of the pleat spacers. So, we'll set these on the side.
Ok, now, there's a couple of different versions of this as well. This particular filter box is the newest style, although it hinges up like this. There was an older style, that used a piece of black plastic right here, that slid on, that sealed the end of this filter. That's a first generation version, that would slide on, then the pleat spacers would clip into it. Again, this is the newest version. so, we're going to take this filter out. Ok, we'll set it on the side, this filter is dirty.
Alright, now, while you're in here what you can id is you can vacuum the seal here and here, these aren't so bad. But, if your seals are really dirty, or the inside of this is really dirty, you can go ahead and vacuum it off with a brush on the end of a vacuum cleaner. That's the easiest way to do it. You can wipe it down, but the vacuum brush is a whole lot easier. So let's put the new filter in.
Alright, here's a brand new filter, part number 201. If you have a 2400 air cleaner, this would be a part 401. They look just the same as this. Alright, spread this out, ok. Now, on each end there's little pieces of cardboard strip, with two little holes in it. And there's a little tab, here and here, and two over there as well.
First thing you do is, clip the cardboard on the little tab. There you go, so it goes through the little hole that's made for it. Ok, and now we're going to kind of center this filter, and latch it back down. Ok, make sure you get all the snaps snapped. There we go, I'll do the other side, and snap the cover. There we go. Ok, now we'll lift these sides up, and again, snap the little buttons in.
Ok. Now it's time to put the pleat spacers in. And this is the tricky part. Take the first pleat spacer, and the trick to this is, you want to get one of these little fingers, in between, each of the pleats. So the easiest way to try to do that is not like this, that's just really difficult. If you do it on an angle, it's a lot easier. So, take the first one here and you're going to weave it through, like this, so I get one finger between each of the pleats. There we go. Ok, alright. So, we're going to set that one off to the side here. Now, because the rest are easy we're just going to drop these next to this one which has the pleats perfectly spaced. And we'll slide that into position.
Alright, now we're going to snap these into place. Just push down on them gently. There we go. Ok, they're all snapped in, everything looks good here.
Now we can reinstall this inside of the cabinet. Now, there's a track in here, and that's to stop you from putting this in the wrong direction, or backwards or upside down. so, the pleat spacers always go towards the furnace.
You'll notice, if you look carefully, there's an arrow right here. It's pointing in the direction of the air flow. Now, the direction of the air flow is always towards the furnace. So, on our demo unit, we have the return air duct right here, so this is sucking the air from your home, in the winter time it would be the cold air in your home. It's sucking it out of the home, down this way, makes a turn, through the air cleaner, then into the furnace, and back out into your home. So, air flow is this way. Towards the furnace. So, we have the arrow right here, and we're going to have that pointed towards the furnace. Handle in the front. Slides right in. Take the door. Snap it into position. And that's it. Now we can turn the furnace back on.
Thank you for watching, for this and other products, visit us at AirQualityParts.com
Be sure to turn the power off, before performing any maintenance.
Alright, let's take the door off. and slide out the filter box. Alright, now, you're going to throw this whole thing away. We're no longer going to need it. So, let's get rid of this.
Alright, let's get ready to open this up. And, instructions, you're going to want to save this, this is not packing, this is a styrofoam piece we're going to use behind the door. We're going to talk about this later though. Little sticker that says "you have upgraded your air cleaner," you're going to want to save that, that goes on the door. There's a new filter. And our frame assembly.
Alright, we have two rails, and four uprights. Alright, these all snap together, no tools are necessary. so, these rails, there's no front or back, but there is an inside and an outside. Ok, so the part that goes inside, is here. This part here, goes outside. Because you want these rails here sticking in, because this is what the new filter is going to slide on to. so, we'll snap this together like this, and we'll turn it upside down, and put the next rail on, again, we need to be careful to put it in right, we don't want to put it in this way. It goes in, like this. Alright, so it snapped together.
Alright, now let's talk about this cabin for a second. You'll notice inside this cabinet, there are rails. Top and bottom, the rail goes from the front, all the way to the back. There's one here, there's another here. It's important that you have those rails, otherwise, you're not going to be able to do your upgrade kit. Older versions of this air cleaner, made prior to 1985, did not have the rails, they had little tabs sticking up in the air. So, no place to put this new rail system, so those units are not upgradable. This is the newer version, it is upgradable. so let's slide this in here, slides onto the existing rails. Alright, your rail is on the other rail. Now, if you look real close here you'll see that there's two little tabs here. You're going to bend one of these down. This one is too long, this one is shorter so you're going to bend it down. The purpose of that is to stop this railing from coming back out. so there's one here, there's another short one here, and we're going to bend this one in. Ok, now, grab this, we can't come out anymore, that's what those tabs do, it keeps it in there permanently.
Now, let's get our filter out. Alright, here's our new filter. It has a little plastic track here, ok, it slides onto those rails. The other thing that's important, is the arrow. Now this happens to be a 213 filter, there's also a 413 filter, the 213 fits in this particular air cleaner. 413 fits in a different model. But, what's important is the arrow. Ok, it says air flow, with the arrow. The air flow is always towards the furnace. so, this is our demo unit, the air is coming from your home, comes down, goes through the air cleaner, gets cleaned, into your furnace, to get heated or cooled, and gets blown back into your home. So again, the arrow is going this way, which is the direction of the air flow.
So, we have the little railing here, we're going to meet it up with these tracks.Ok, top and bottom are both in, and we slide into position.
Ok, now, the only thing left is the door. This is where the styrofoam piece comes in handy. We'll take this little sticker off, and we'll get it out of the way. This door, has an uneven surface on the back side. You need a nice even surface, for this filter to line up against. That's why this is sent out. This snaps into position on the back of the door. Ok, now, this is only required on the 3rd generation air cleaner, which uses this style door. You'll notice that this little door has four little tabs on it, there's four little sockets here, and they meet up. Now, we're going to put this door on it, and I'll show you an older door. Alright, this is a generation two door. It already has a seal kit on the backside of it. It's a nice flat surface, so that styrofoam piece would not be necessary if you had that style door. In which case, you can throw the styrofoam piece away. So this door, mounts in a different manner, on this generation two style, there is a plastic latch on the top, that lifts up, and holds the door on. There's one on top and on the bottom. That's what holds this style door on. so, but this is a generation three door, it required the styrofoam filler, which we installed.
And, so that air cleaner is all set up, last thing to do, is this little sticker, you're going to want to place this, on the front of the air cleaner, so that if any service technician happens to work on it, they'll see this thing, and they'll know that it uses the style 213, or 413 air filter, since it's been upgraded. And that's it, that's how you upgrade your air cleaner.
Thank you for watching. For this and other videos, visit us at AirQualityParts.com.
Be sure to turn the power off before performing any maintenance.
Alright let's change the filter. This is a new style air cleaner, this is an old style air cleaner. Now this one has been upgraded to use the new style filter, so we're just going to show you how this filter goes in, it's real simple to do.
Pull the door off, the back of the door has the model number, and from that we can determine what air cleaner your particular air filter takes. We'll set the door on the side, take out the old filter, an we'll take the new filter out of the box. Ok, there's an arrow on this thing, the arrow always points towards the furnace, that is the direction of the air flow. The air is always going towards the furnace, so if this air cleaner cabinet were installed right here, the air would be going that way so we're going to have the arrow pointing this way. Now I like to put these little plastic guides onto the metal rail. I like to do the bottom first, and then the top. I think it's easier. Ok, there's the bottom one, and we'll bring the top up, and slide it on. Put the door on, and we're done. It's that simple.
Thank you for watching, for this and other products, visit us at AirQualityParts.com
FAQs
Hi, I'm Jay, and this is our demo unit. We often get questions asking what the individual components are, so we thought we'd talk about that today. So, on this demo unit, this is the return air duct work, so this would be the duct work that brings the air from your home into the furnace to get heated or cooled. So, on the side here we happened to have a return air grill, like you typically find on the wall or ceiling of a home. The air would come down here, through the return air grill, down this duct.
This happens to be a humidistat. This can be mounted on the return air duct, which is the most common location you'll find these humidistats. This one is a digital one, there are mechanical ones as well. They are, again, most often mounted on the return air duct. Although sometimes they can be mounted, certain models at least, inside the home. And when they're done that way, they are often very closely mounted to the thermostat. so, like within a foot or two of the thermostat.
So anyways the air from your home would be sucked into the return air grill, come down this duct, go this way, turn, go through the air cleaner, into the furnace, there's a blower down here in this furnace, inside here is the heating chamber, so it goes through the heat exchanger, the air goes up through the heat exchanger, this happens to be a cooling coil, so if you have air conditioning, you'll have one of these directly above your furnace. So, inside of this is a radiator looking device, so the air that goes through this would be cooled in the summertime, and it goes up into the supply plenum, and gets discharged into your home. So, in the wintertime, the supply plenum would be hot air into this, and it would blow up into the duct work, and come out of the registers in your house.
This is the flu pipe, for the furnace, we don't happen to have a gas line attached to this demo unit, but if we did, the gas would go up through this and outside the home.
The air cleaner here, this happens to be the Aprilaire 5000 air cleaner, and if you look closely at the front, you'll see it mentions the model number here, so the air comes from your home, through the return air grill, down the return air duct, happens to pass the humidistat, goes down, goes through the air cleaner, gets cleaned, goes into the furnace, gets heated in the wintertime, or, cooled in the summertime, comes out into the supply plenum, and gets blown back into your home.
Our demo unit has a humidifier, this is a 600 model Aprilaire, mounted on the side of it, you'll see that there's a model number here, and there's also a sticker over here on the side. That gives you the model and serial number. This one being a 600, it's a bypass style humidifier. So there's a 6 inch around bypass duct that's attached here, it comes around, and it's attached to the return air duct work, which we discussed earlier. There is also a drain line on this humidifier, so whenever the humidifier is running, water will trickle down the drain. Here's the water line. And this is the low voltage control wiring, for the humidifier. That drain comes down here, then gets attached to the air conditioner drain here. They go down, this particular model happens to be set up with a condensate pump, for our demonstration room here.
This is the cooling coil, supply plenum, so in the wintertime, the furnace would heat the air, it would then blow it through the cooling coil which would not be functional in the winter time, the air would then go into the supply plenum here, go up, and then come out and get blown into your home.
Thank you for watching, for this and other products, visit us at AirQualityParts.com
Documentation
Still Need Help?
Browser Not Supported
You are using Internet Explorer as your browser, which is no longer supported by our website. Because of this, you can view products but not place orders using Internet Explorer on our site.
Please update your browser to any of the modern browsers listed below or use a different internet browser to place an order on this site.
If you have any questions or need assistance with placing an order, please contact us at 800-825-2148 or sales@airqualityparts.com


